Report Generation
The AffableBPM system provides comprehensive and dynamic report generation of records. The Report Generation page allows you to create reports and specify conditions how records will be included in the report.
Report Generation Menu
The Report Generation menu allows you to create a report based on a query or filter, see below screenshot. A workflow must be selected to create a report.
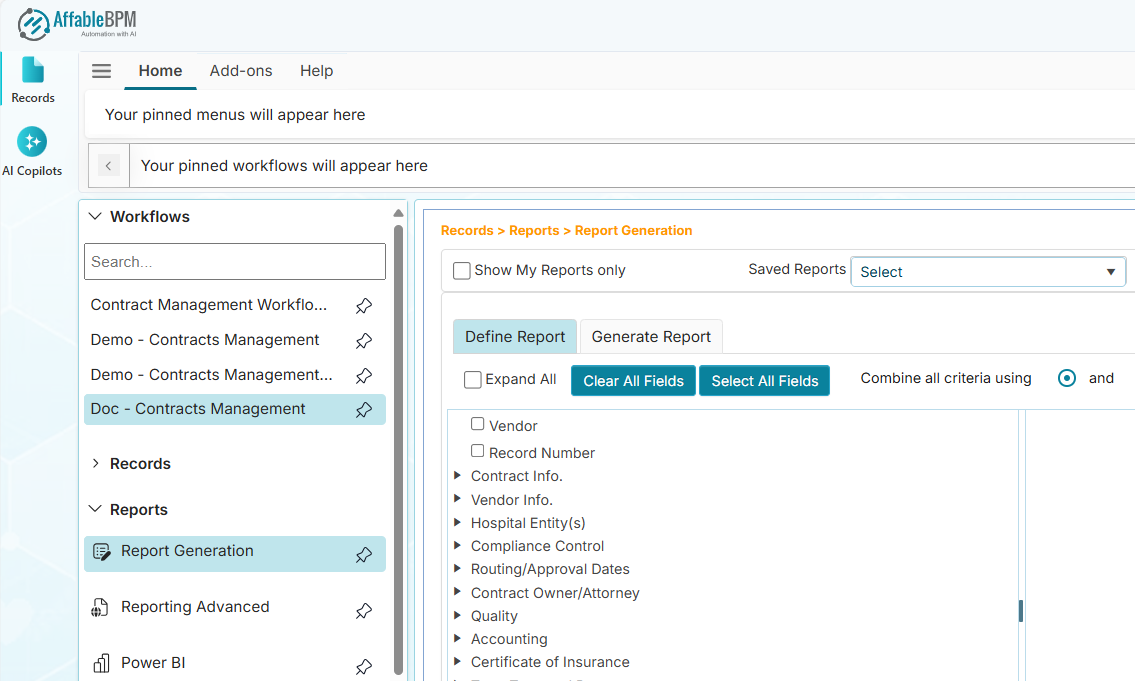
Show My Reports Only
Ticking the Show My Reports Only checkbox will filter all your saved reports. When unticked, you can see all other reports created by other users.
Saved Reports
The Saved Reports dropdown box allows you to select a previously defined reports. Selecting a Saved Report saves you time redefining the report based on a previously selected fields and filter conditions.
Running a saved report will always get the latest data from the workflow.
Define Report Tab
The Define Report tab allows you to select which fields will be included in the report. The following options describe their uses:
- The Expand All checkbox allows you to expand all field nodes.
- The Clear All Fields unselects the fields from the report definition.
- The Select All Fields marks all fields for inclusion in the report.
- The Combine All Criteria affects the result of the report.
- The and option means all field criteria must be met to produce the report.
- The or option means any of the field criteria should be met to produce the report.
How to Create a Report
-
In the Workflows listing section menu, select the workflow that you wish to create a report.
-
Click the Reports section menu then click its Report Generation menu. The main content panel will show the list of fields from the selected workflow.
-
In the Define Report tab, tick the Expand All checkbox to show all the fields of the workflow. You may click each parent node's collapse/expand arrow to show or hide the sub fields.
-
To include a field in the report, tick the field's checkbox.
warningIf no fields are ticked and you clicked the Generate Report tab, the app will select all fields in report generation.
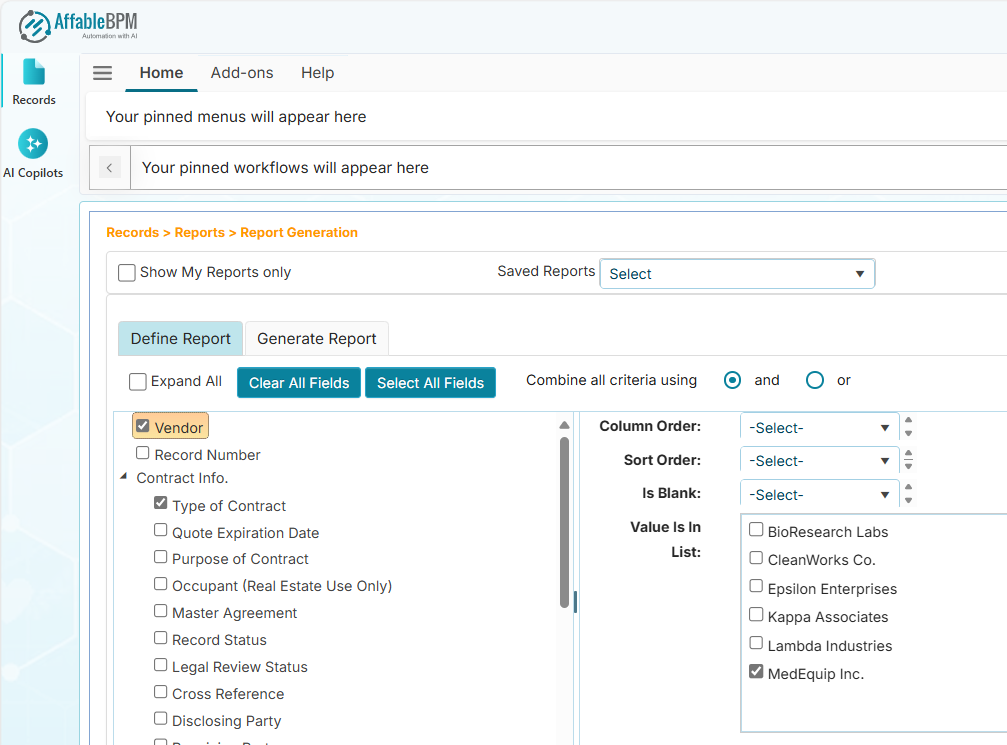
- For each ticked field, the right panel settings allows you to order or filter the records:
-
Column Order - Allows you to set the column order of the field in the report. If no selection is made, the field will appear in the order it was ticked.
-
Sort Order - Allows you to designate the sort order priority of the field. If no selection is made, the first field will be used to sort. Once the report is generated, you can click the column header to sort the row values.
-
Is blank - Choose Yes if you wish to filter records where the field is blank.
-
contains - Allows you to filter records for the partial value of the field.
-
is like - Allows you to filter records for the exact value of the field.
-
Value is in List - Allows you to filter dropdown field values.
-
Date - Allows you to filter records that exactly matches the date value.
-
Date After - Allows you to filter records after the specified date.
-
Date Before - Allows you to filter records before the specified date.
-
Date Range - Allows you to filter records based on the current system date the report is executed. You can filter for the previous or next days/month.
noteYou will need to specify the days or month value in the Date Range box.
-
Belongs to - Allows you to filter records that could have the values Yes, No, or Both.
-
Greater than - Allows you to filter records that is greater than the specified value.
-
Less than - Allows you to filter records that is lower than the specified value.
-
Calculation - Allows you to add aggregate summaries at the bottom of the report. The available options are:
- Sum - Get the sum value for all records of the selected field.
- Min - Get the the minimum value of the selected field againts all records.
- Max - Get the maximum value of the selected field againts all records.
- Count - Get the total count of records for the selected field.
-
Generate Report Tab
After selecting the fields, click the Generate Report tab to begin extracting the records. See below sample screenshot.
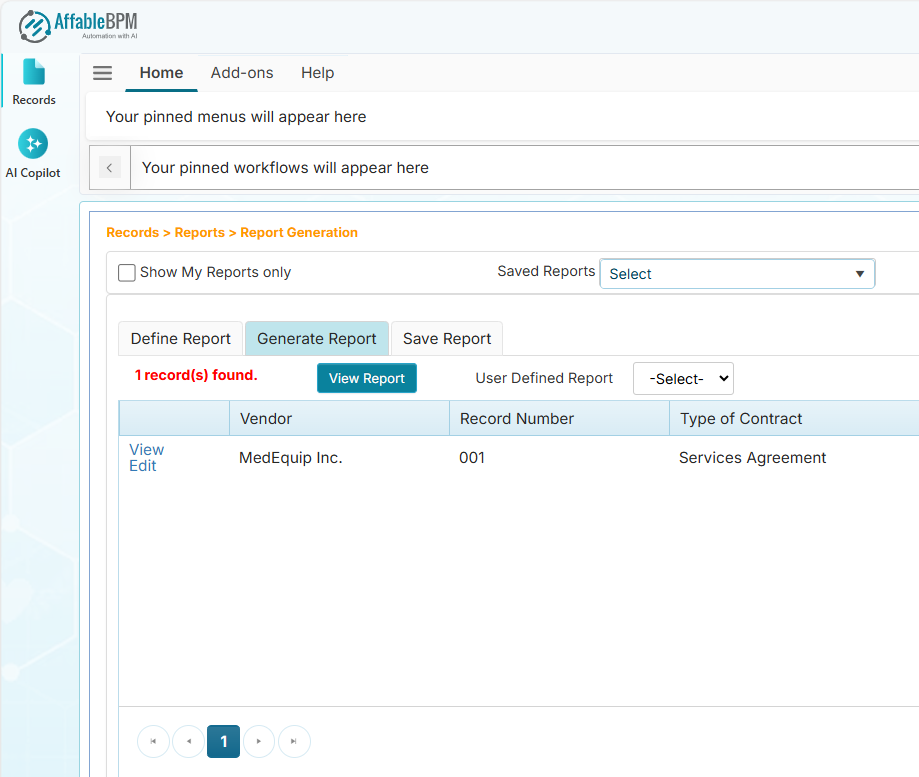
If there are records found, they will be displayed in a grid. The first column of the grid has a link that allows you to view the record. A report can be printed using the user defined report layout or using the built-in report layout.
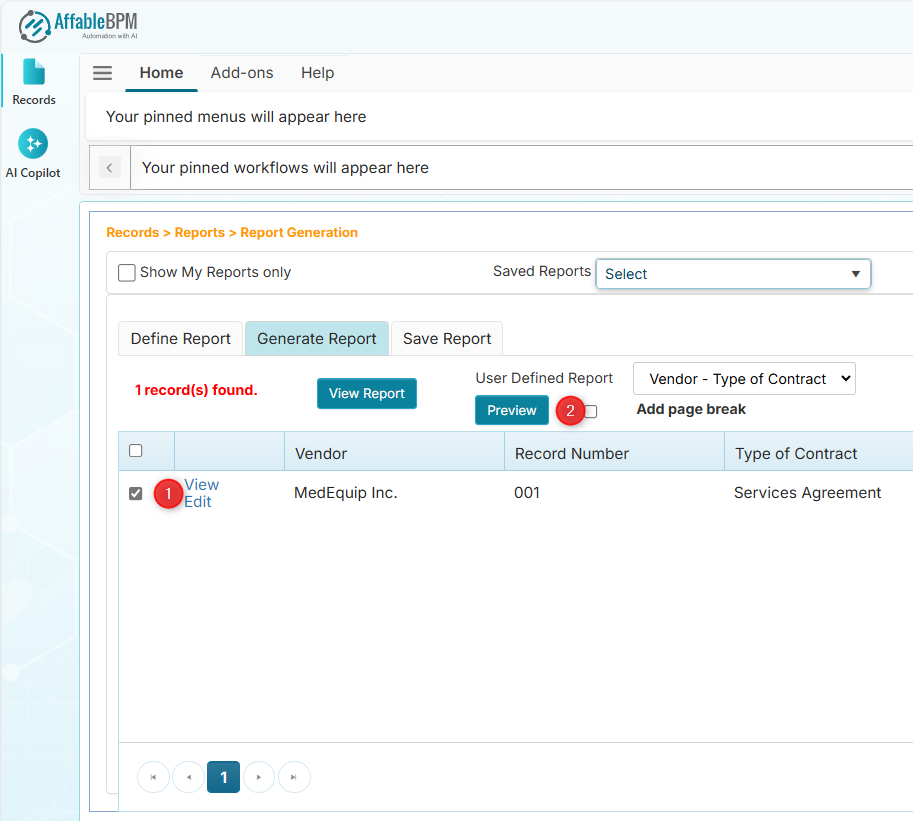
User Defined Report
A report template can be used to format a report layout. Once it is available, it will be listed in the User Define Report dropdown in the Generate Report tab as shown below.
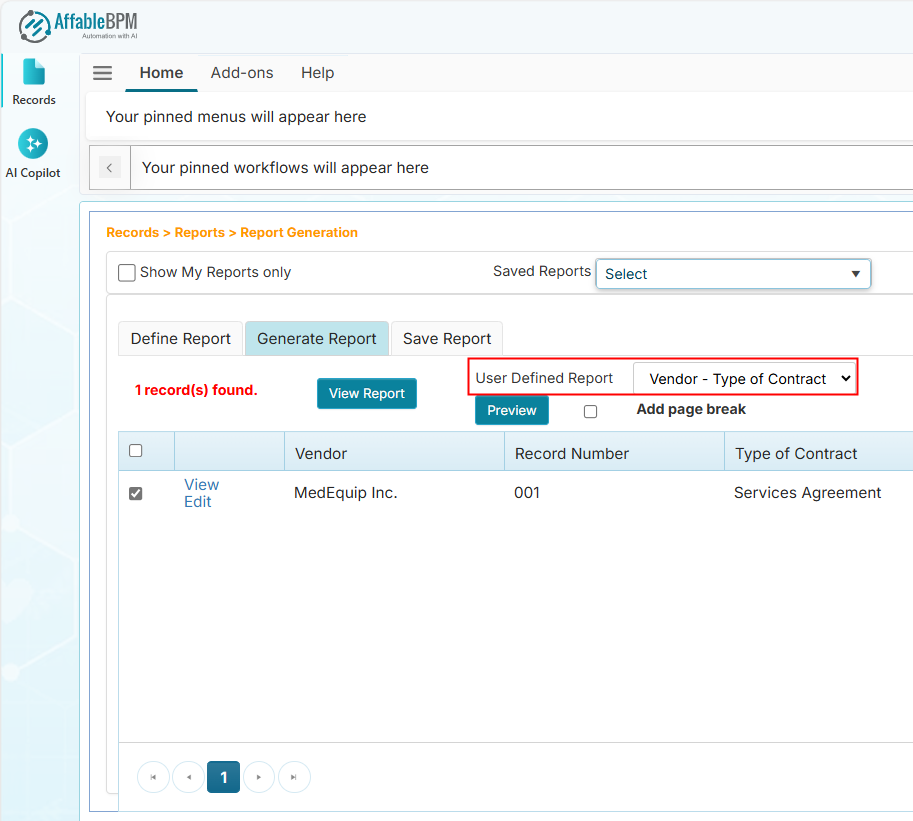
How to Use the User Defined Report
When a User Defined Report is selected, the leftmost column of each row will have a checkbox.
- Tick each row that you wish to include in the report. See below screenshot.
- Tick the column header checkbox to tick/untick all rows.
- Click the Preview button to show the online preview of the report.
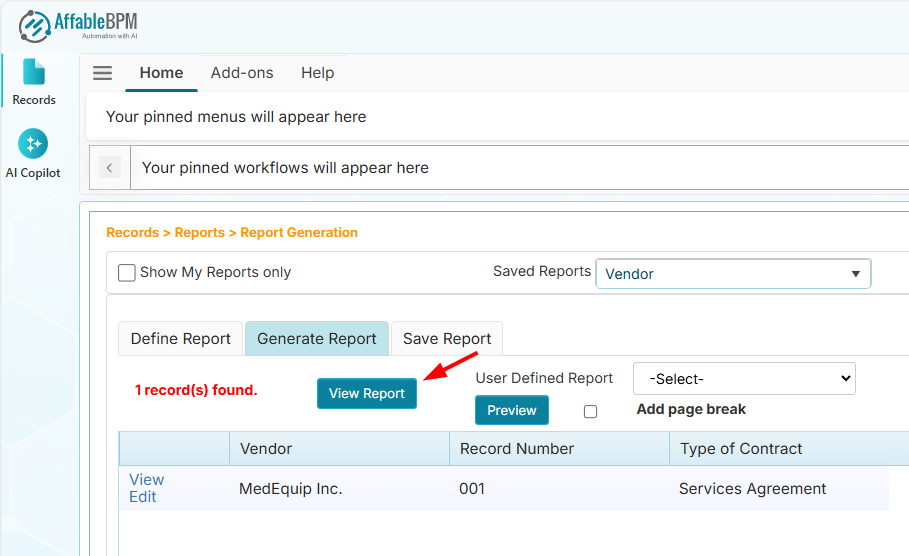
Built-In Report Layout
The View Report button allows you to print the report using the regular report layout. It allows you to see the report preview, export the report in different formats, change the report headings and margins, and change the column sizes of the report. See below sample screenshot.
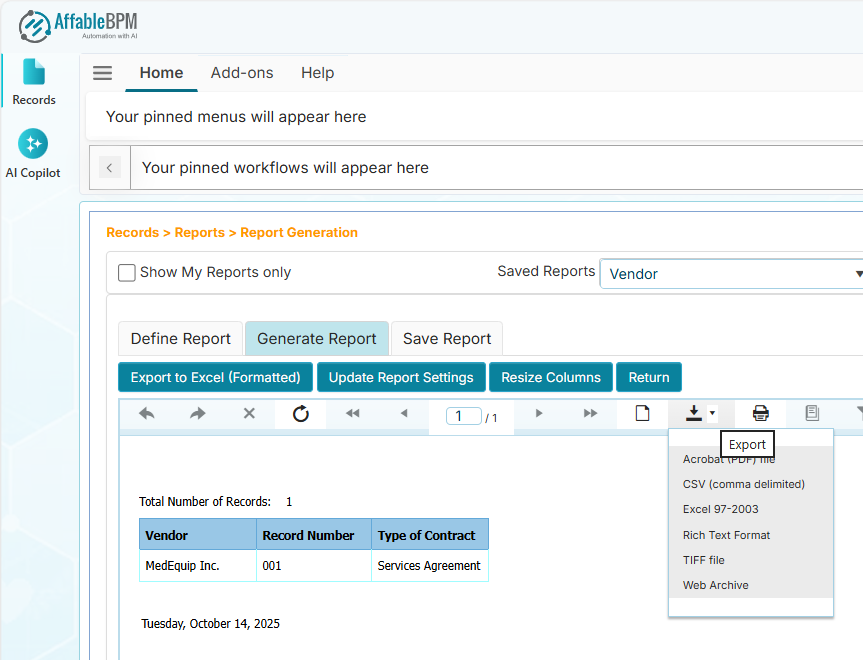
How to Export the Report
The report can be exported into different file format like MS Excel (Formatted), PDF, CSV, MS Excel 97-2003, Rich Text Format, TIFF and Web Archive.
- In the report preview, click the Export menu to save the report in your preferred format. See sample screenshot below.
- You can verify the completion of the report download in the browser's Downloads listing. This is commonly accessed by pressing Ctrl+J in your browser.
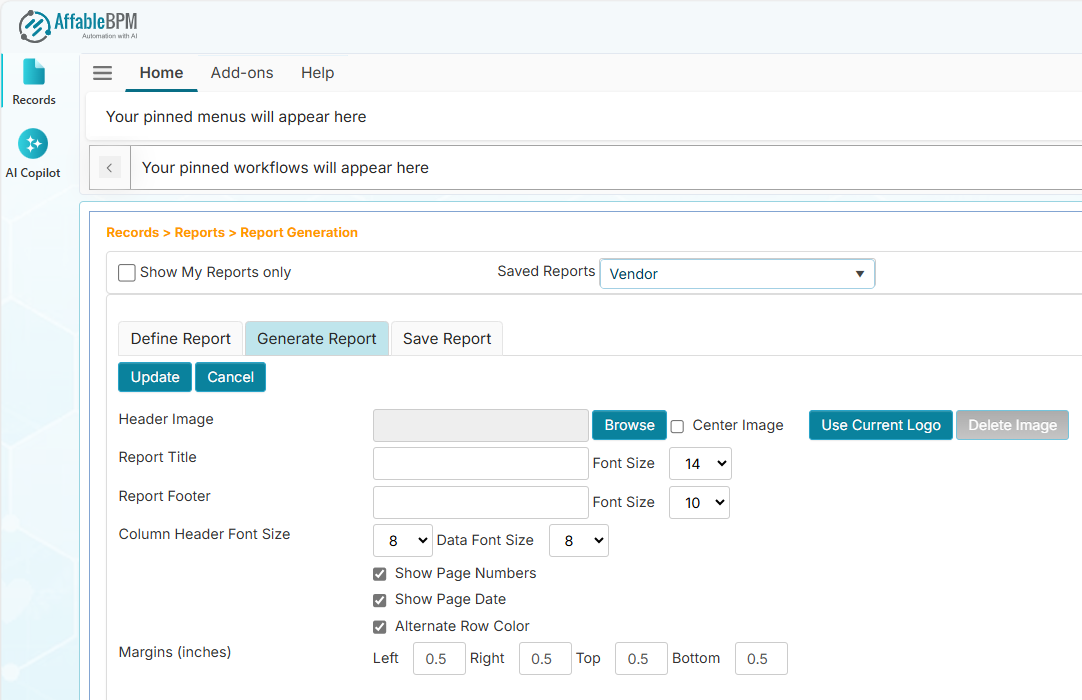
Update Report Settings
The Update Report Settings allows to configure the report headings, logos, column header and row value sizes, and margins of the report. See sample screenshot below.
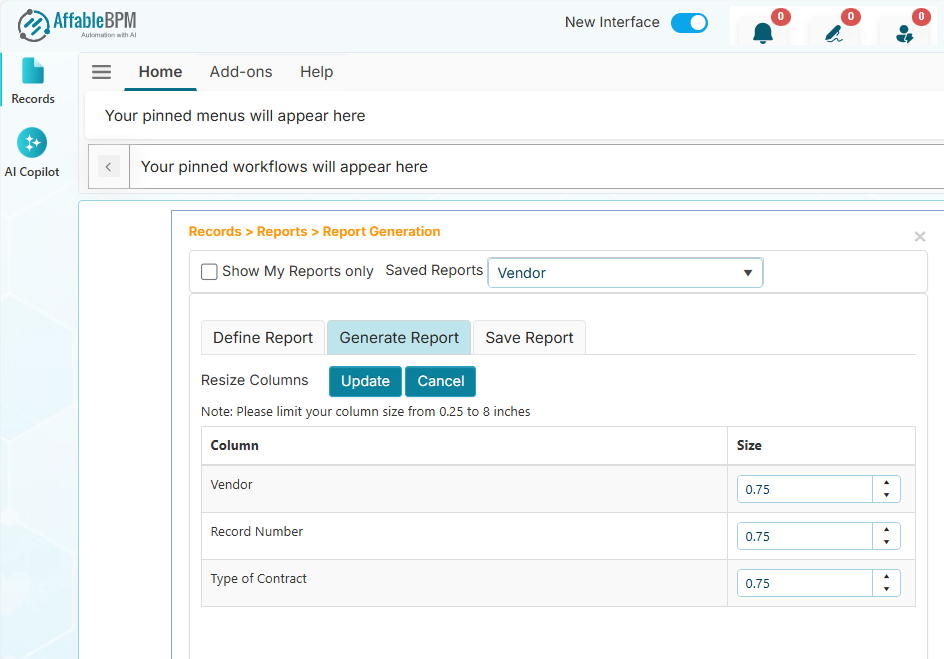
Resize Columns
The Resize Columns allows you to change the report column sizes in inches. See sample screenshot below.
Save Report Tab
The Save Report tab allows you to save your report definition. See sample screenshot below.
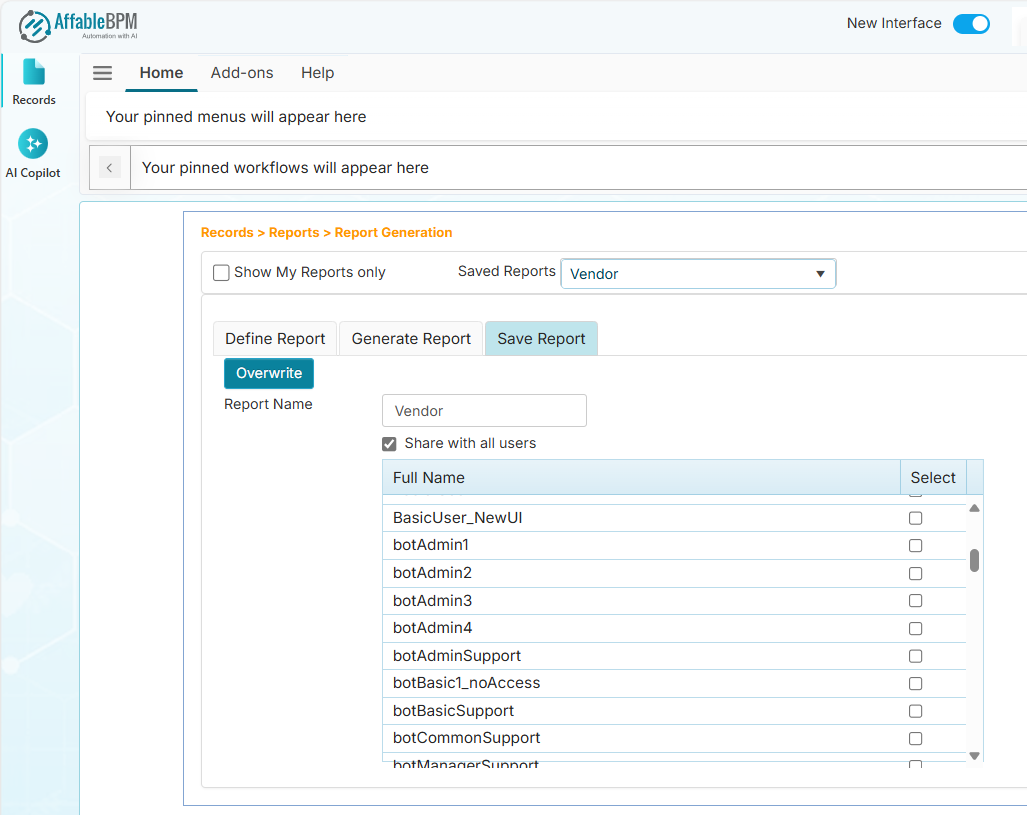
How to Save a Report
- In the Report Name field, enter the name of the report.
- If you wish the report to be accessible by other users, tick the Share with all users checkbox. You can choose which user can access your report by ticking their checkboxes under the Select column.
- Click the Save button to save the report.
Save as Dashboard Tab
The Save as Dashboard tab allows you to save your report definition and make it available in the Dashboard menu. See sample screenshot below. The Save as Dashboard appears when you clicked the View Report menu under the Generate Report tab.
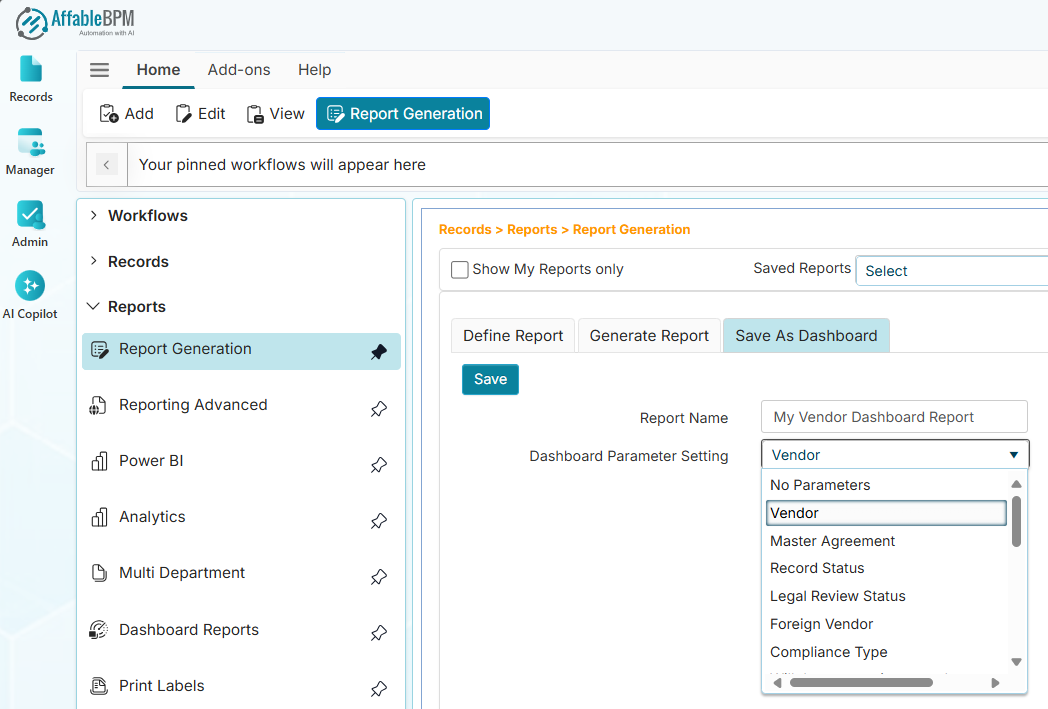
The Save as Dashboard is available only for users with Manager and/or Administrator access.
How to Save a Dashboard Report
- Generate a report and click the View Report button.
- Click the Save as Dashboard tab and enter the report name. If the report has values coming from a drop down field, the Dashboard Parameter Setting dropdown will list fields as an option to filter the report output.
- Click the Save button to save and add the report into the Dashboard menu.