How to View a Record
-
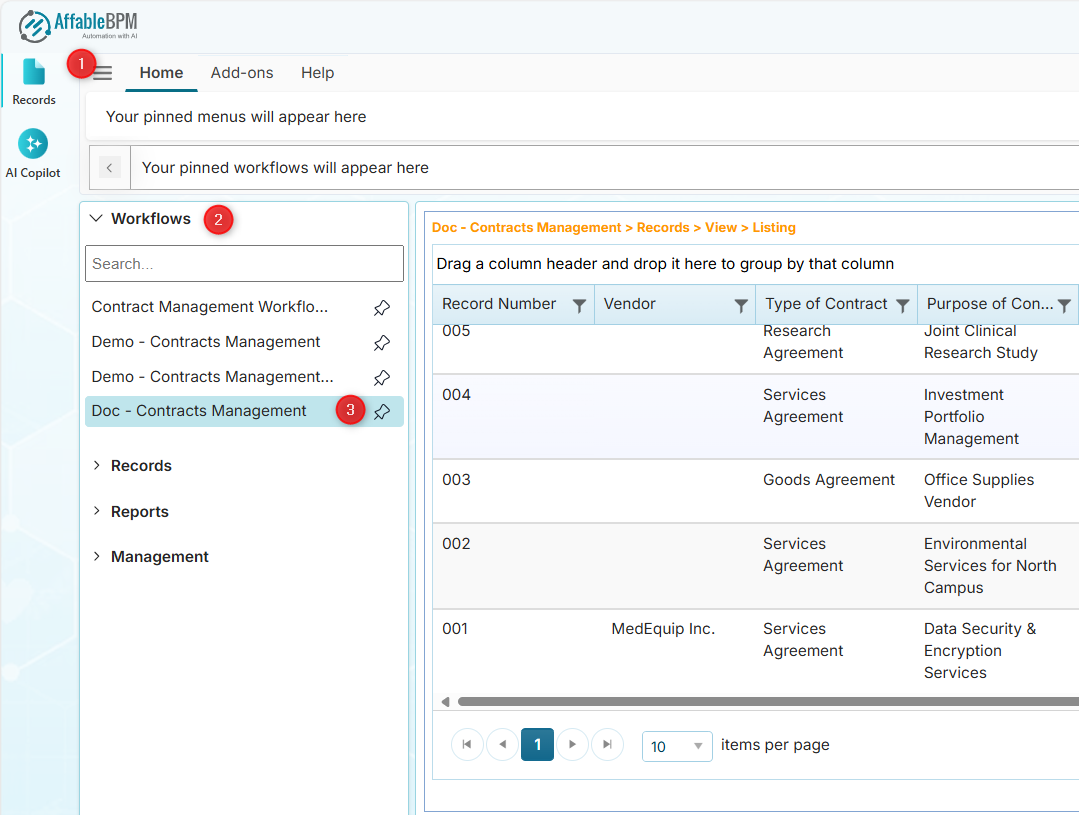
From the sidebar tab, click the Records menu.
-
Click the Workflows section menu to find your assigned workflow.
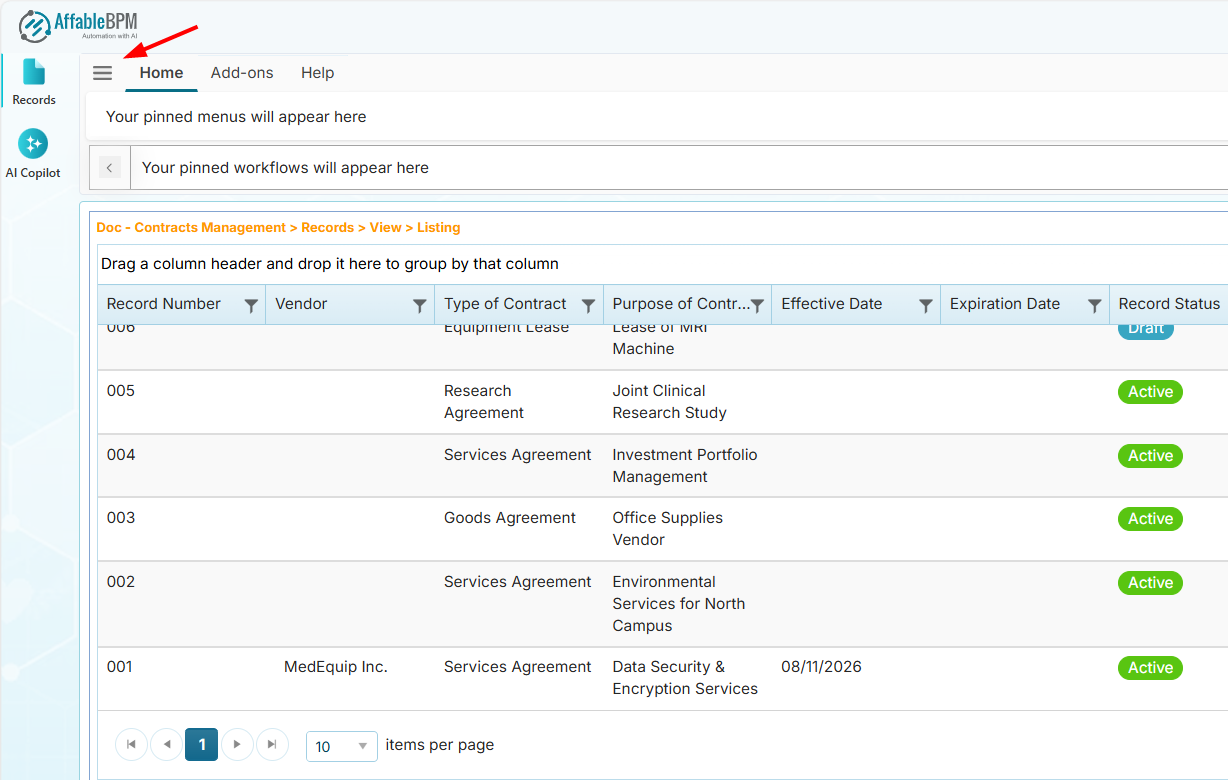
(Optional) To give you more space, you can click the hamburger menu to hide the section menus.
 note
note- The record listing displays all active records in the selected workflow.
- Inactive records are stored in the archived copy of the workflow denoted by the suffix (Archive) e.g., Doc - Contracts Management (Archive).
-
Click any row in the record listing to view the record.
 info
info-
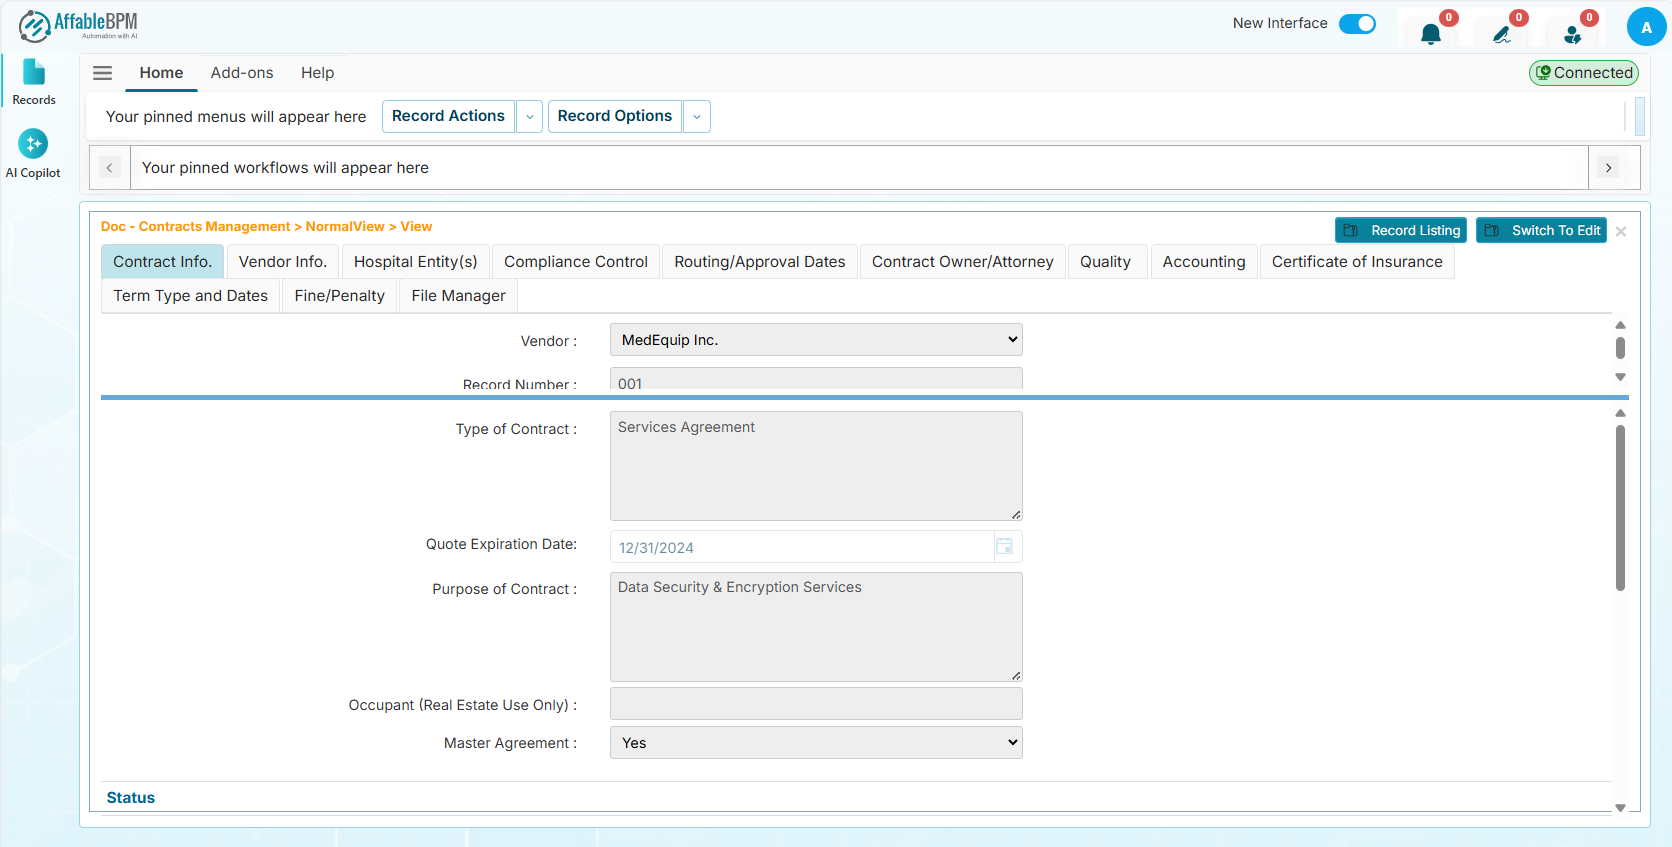
In View Mode, the fields are read-only.
-
You cannot add a comment or route a record unless you have been granted access.
-
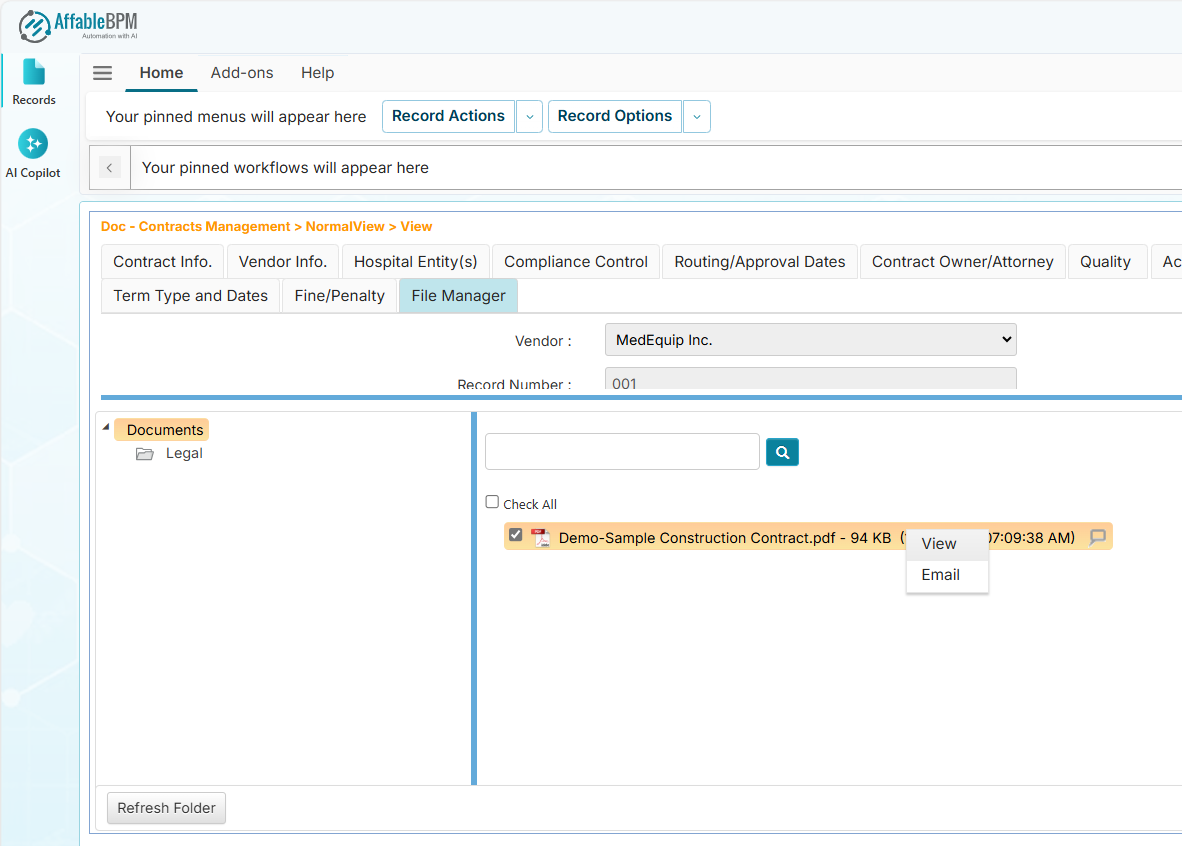
In the File Manager, some document menus such as Rename, Request Signature, and Delete will not be available. You can only view or email a document.
-
Record Actions Dropdown
In View mode, the Record Actions dropdown will display the options for Record Listing or Switch to Edit.
Record Listing Menu
Click the Record Listing menu if you wish to go back to the listing.
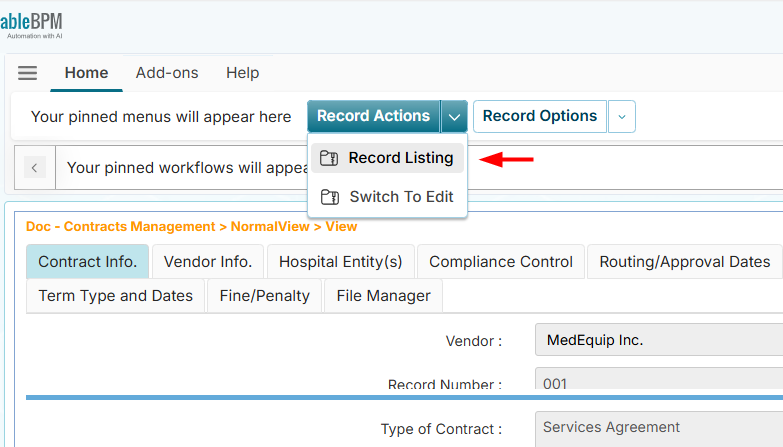
Switch to Edit Menu
If you wish to update the record:
- Click Switch to Edit
- Make your changes
- Click Save when you are done
You can switch to edit mode only if you have been granted edit access.
Record Options Dropdown
The Record Options dropdown lets you perform additional actions on the record, such as printing the record, emailing, viewing comments, creating a route, and more.
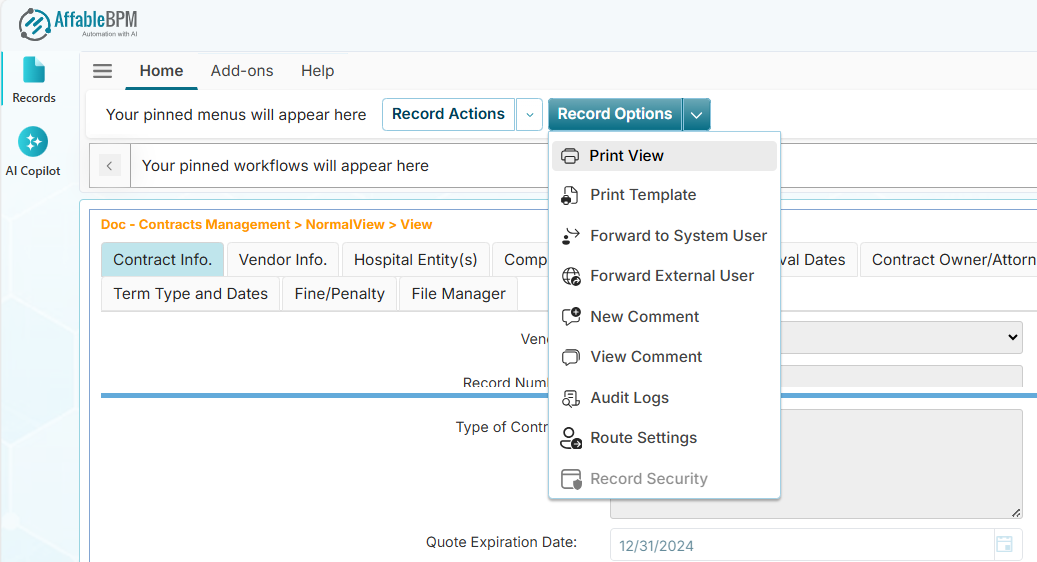
These options are shown depending on your granted access.
Print View Menu
The Print View menu provides a printable version of the record. It opens a new browser tab listing all fields and their values.
Print Template Menu
The Print Template menu allows you to print the record using a custom report template. It opens a new browser tab based on the selected report template.
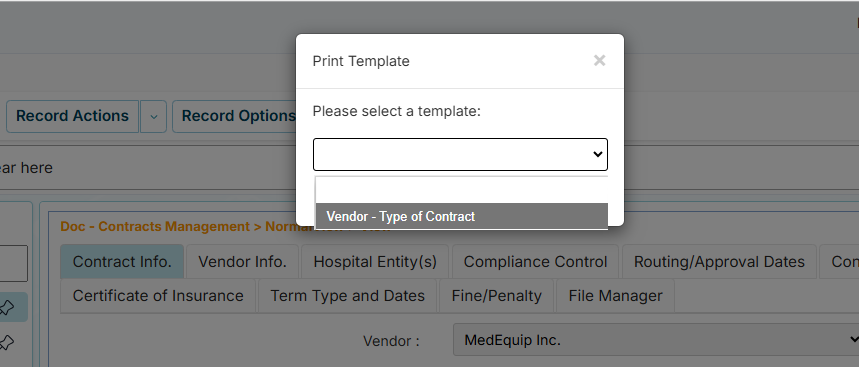
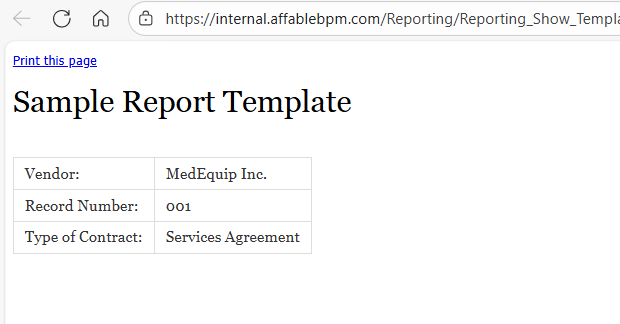
Below is a basic sample of the sample report template.
You can use an HTML report template or a Word report template to print the record.
Forward to System User Menu
The Forward to System User menu allows you to send an email with an embedded link to the record.
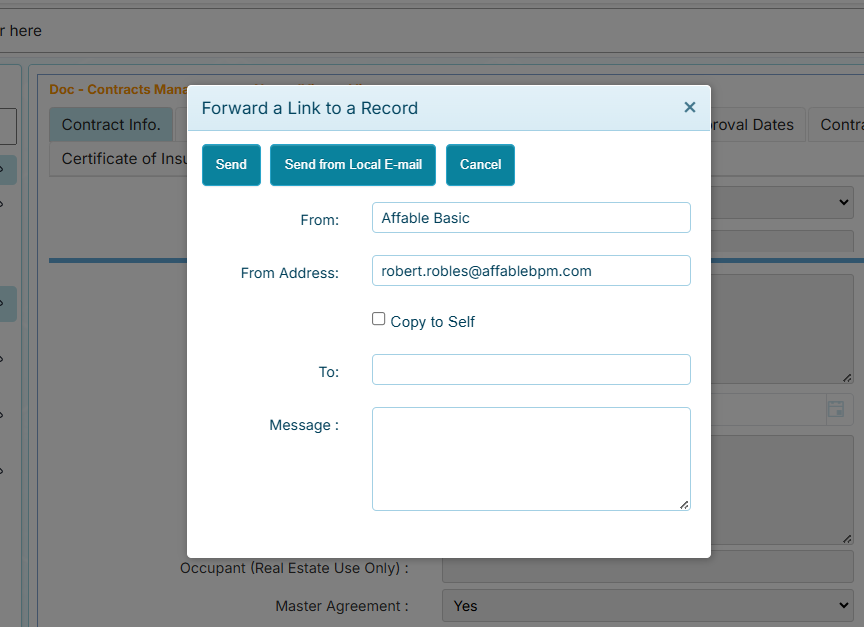
Your email recipient must have the login access to be view the record.
Clicking the Send from Local E-mail button will open your local mail client, such as MS outlook, to send the email.
Forward to External User Menu
The Forward to System User menu does the same functionality like the Forward to System User except that the recipient is an external user that has restrictive access to the application features.
New Comment Menu
The New Comment menu allows you to add a new comment to the record. The comment serves as a communication tool to document actions the user has taken on the record.

-
When a route setting (automation) is configured, all user comments are tracked and saved in the View Comments window.
-
If you have a pending approval and adding a comment, the Approve and Disapprove buttons will appear.
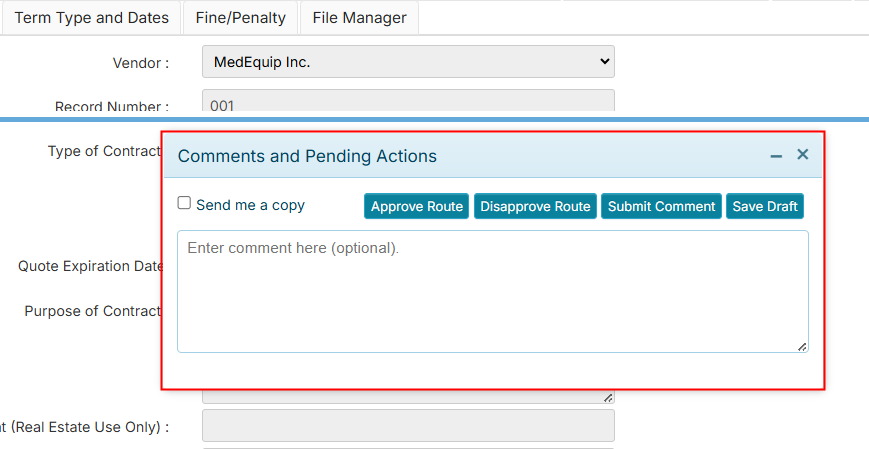
- The Approve Route button approves the review of the record and automatically routes the record to the next recipient.
- The Disapprove Route button will temporarily stops the routing until it is reviewed and approved.
View Comments Menu
The View Comments menu allows you to see all comments added to the record. It includes additional information such as the user who made the comments, the date and timestamp, and action status type.
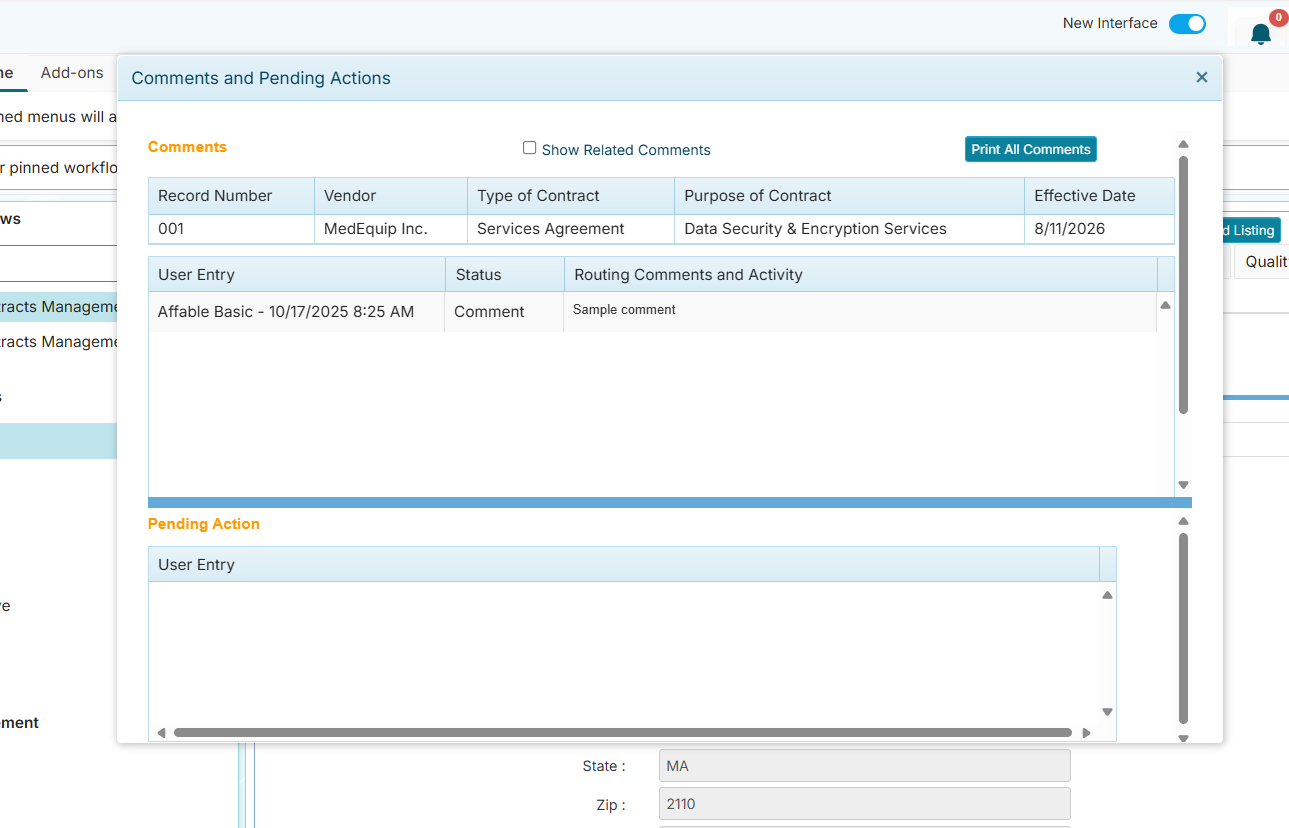
The Pending Action at the bottom lists all routed users with pending approvals.
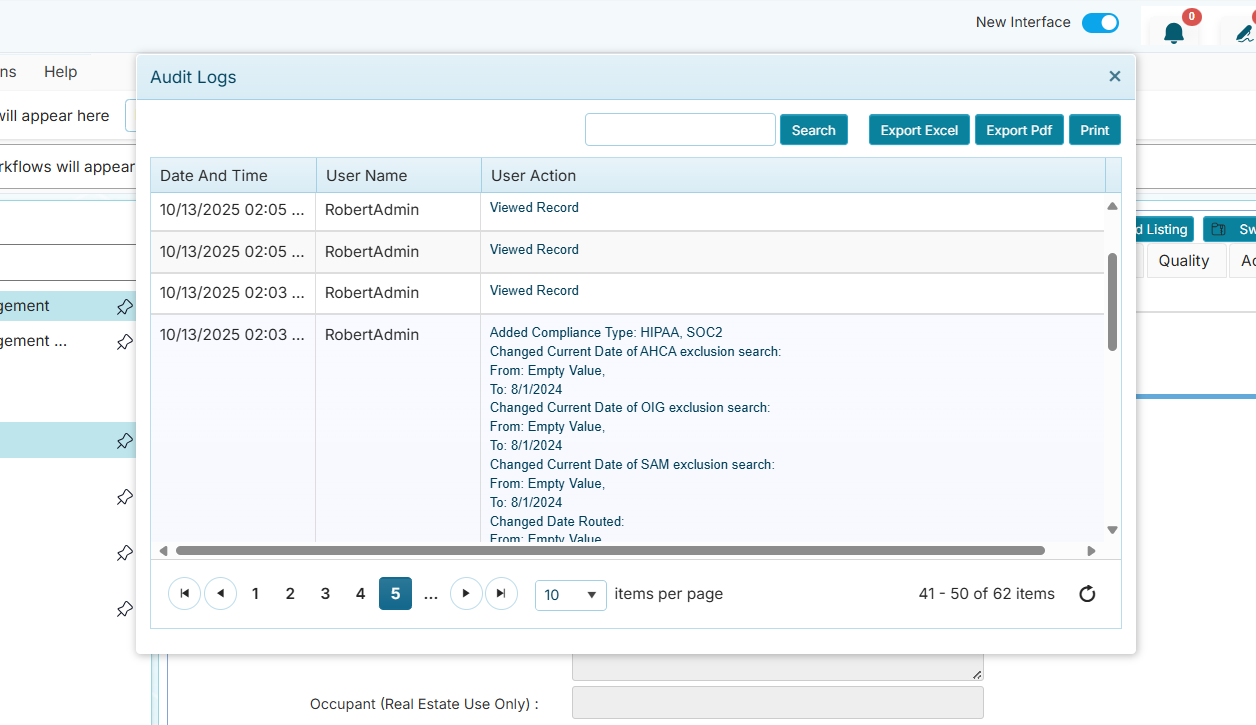
Audit Logs Menu
The Audit Logs allows you to view all actions taken on the record.
Routing Settings Menu
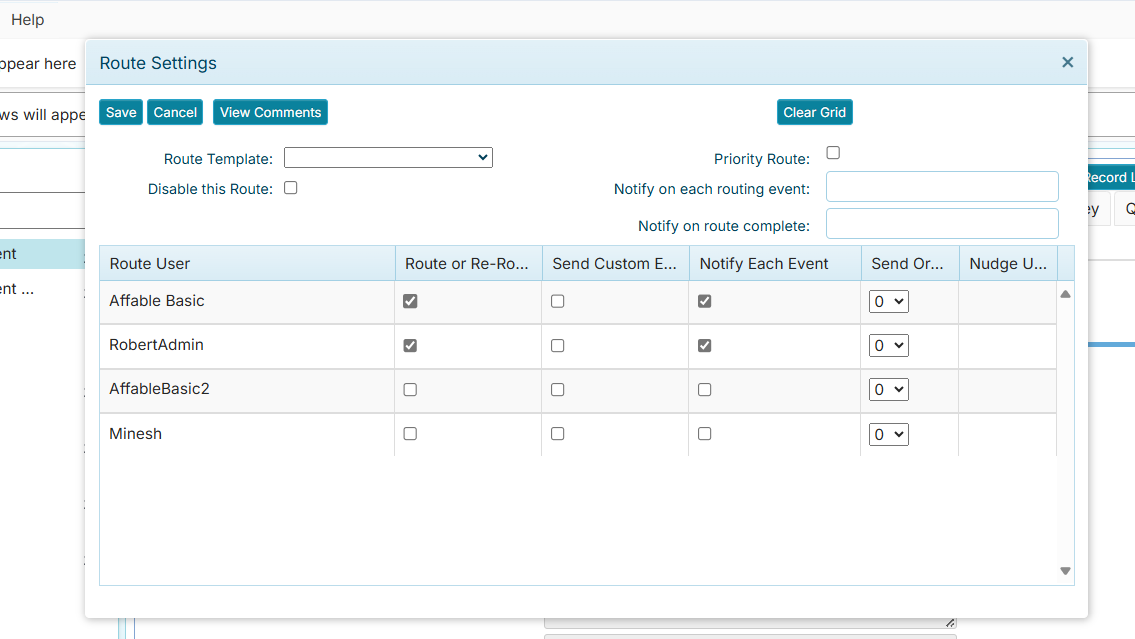
The Route Settings menu allows you to route the record to your recipients.
How to Route a Record
-
Click the Route Settings menu to create a new route or modify an existing route. The Route Settings window lists all users with access to the workflow.
-
For each user to whom you want to send a notification, tick their Route or Re-Route checkboxes.
-
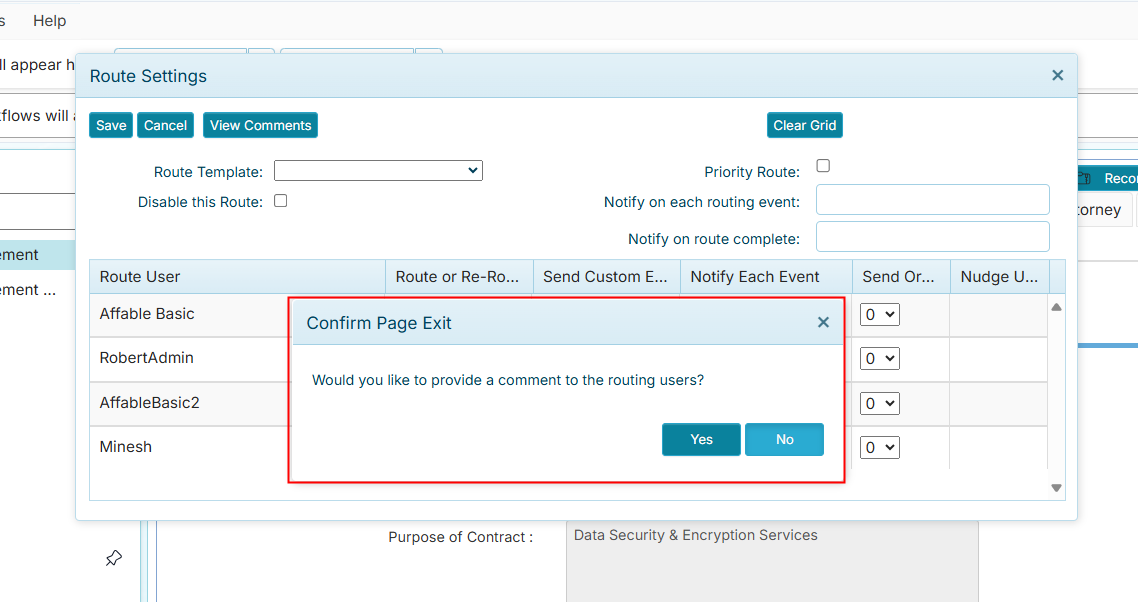
Click The Save button to send the route. A confirmation window will appear asking if you wish to provide comments to the users.
-
Click the Yes button if you wish to add a message. The recipients will be notified by email or receive an in-app message in their Pending Approvals notifications (see User Menu bar).
infoThere Route Settings window has optional features that you can use:
- Route Template - Select a predefined route settings where recipients are already selected.
- Priority Route - Mark the route as a high priority.
- Disable this Route - Stop the route from running temporarily.
- Notify on each routing event - The email address to be notified each time the record is routed.
- Notify Every N Days - Set the day interval when the route notice will be resent.
- Notify on route complete - The email address to be notifiend when all recipients have approved the route.
Below are the uses of the other elements in the window:
- Save Button - Save the route.
- Cance Button - Cancel the changes in the route.
- View Comments Button - Open the comments listing window.
- Clear Grid Button - Clear the route settings.
- Route User Column - Users that can be added in the route.
- Route/Re-Route Column - Checkbox for adding a user to the route.
- Notify Each Event Column - Checkbox to send email whenever another recipient adds a comment.
- Send Order Dropdown - Specifies the send order who will take the first action and who follows next.
- Nudge User Button - Resend the email notification of the pending route (Visible to Admin user.)