File Manager
Overview
The File Manager tab helps you organize and manage documents within your workflows. Each workflow has its own File Manager for every record, where you can store and access related documents.
For example, if you are using the Contract Management workflow, you can upload contracts, proposals, amendments, and related documents to keep everything organized in one place. Similarly, workflows like Invoice Processing or Employee Onboarding have their own document repositories.
Getting Started
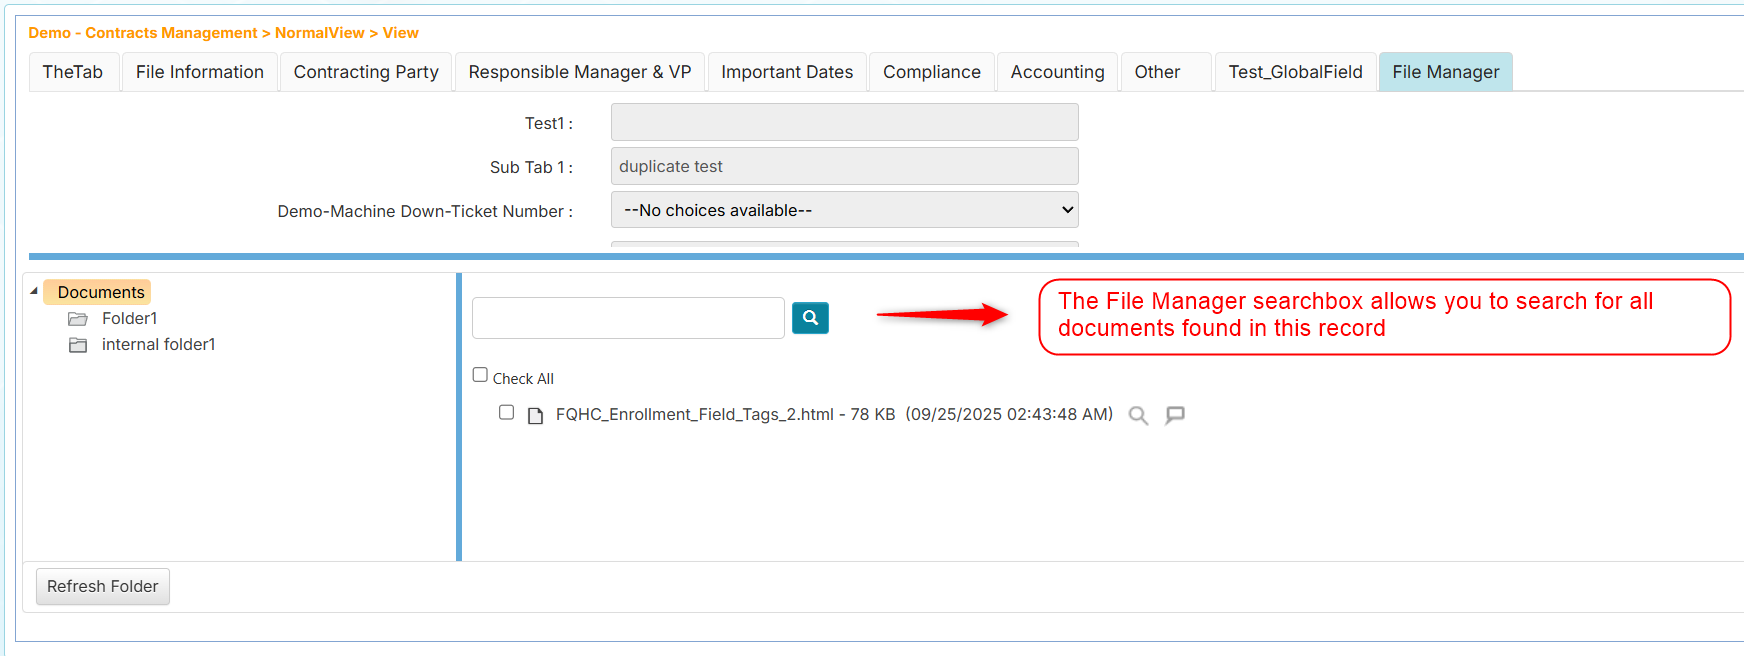
Each record includes a File Manager tab. The folder list appears on the left, and documents within the selected folder are shown on the right. The File Manager may include preconfigured folders set by administrators or managers during record creation. A dedicated search box helps you quickly filter documents.
Understanding Your Permissions
Depending on the permissions granted to you, you can perform different actions:
- View and download documents - Open or save documents to your computer
- Email documents - Send documents to others via email
- Upload documents - Add new documents to folders
- Rename documents - Change document names
- Delete documents - Remove documents permanently
- Set security permissions - Control who can access specific documents (if you have security rights)
You can select multiple documents at once by checking the box next to each document. This allows you to perform bulk operations like moving, emailing, or deleting several documents simultaneously.
Uploading Documents
There are two ways to upload documents to the File Manager:
Method 1: Drag and Drop Upload
-
In the left panel, select the folder where you want to upload your documents
-
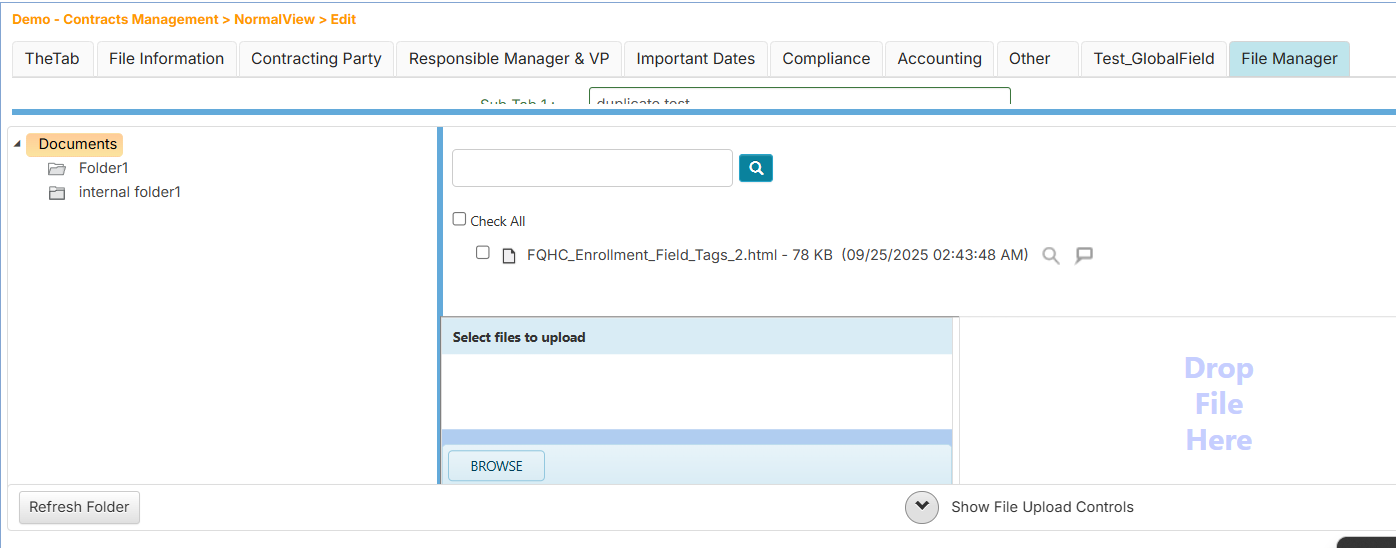
Below the File Manager, click Show File Upload Controls to expand the upload area
-
Drag your file from your computer and drop it into the "Drop File Here" area
 info
info- A progress indicator will appear showing the upload status
- Once complete, your document will appear in the right panel
Method 2: Browse Upload
- In the left panel, select the folder where you want to upload your documents
- Below the File Manager, click Show File Upload Controls
- Click the Browse button
- In the dialog window, locate and select the document you want to upload
- Click Open to begin uploading
The document will be uploaded and appear in your selected folder.
Understanding Duplicate Documents
When you upload a file with the same name as an existing document, the system automatically groups them together under a single document group name. This helps you track different versions of the same document.

How duplicate grouping works:
-
Documents with identical names are grouped together under the document name
-
The upload date and time determine which version is most recent
noteYou cannot perform actions (View, Email) directly on the document group name itself. You must expand the group and select the specific document version you want to work with.
Viewing Documents
To open or download a document:
-
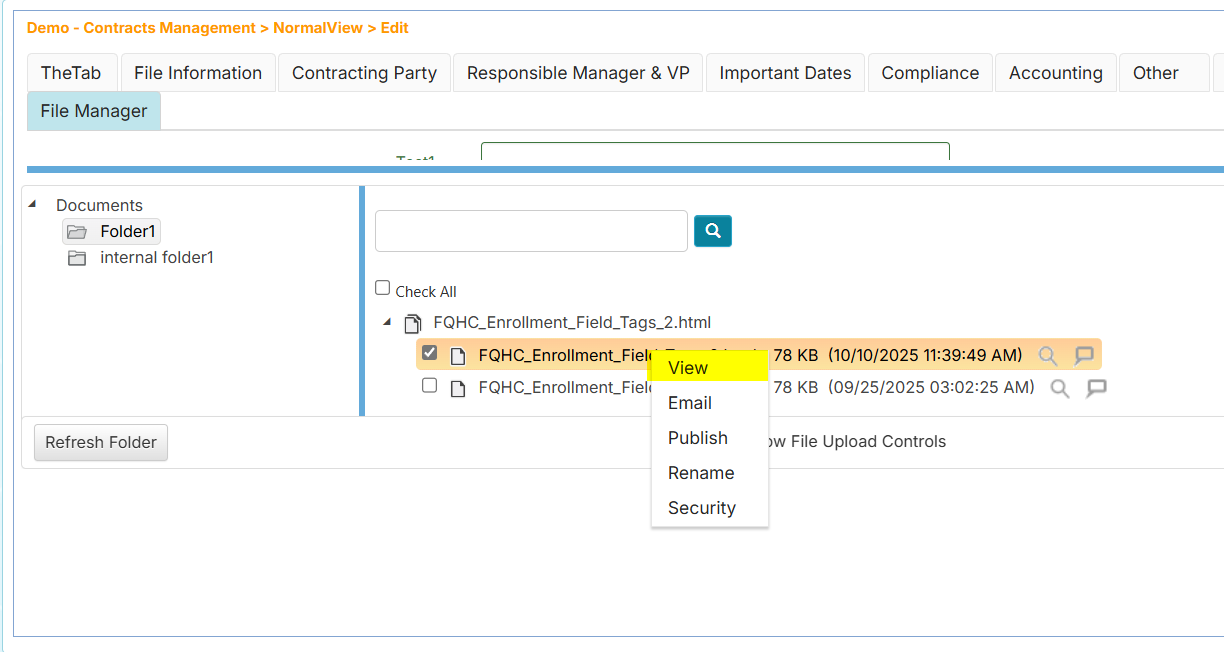
Right-click on the document (not the group name if it's a grouped document)
-
Select View from the context menu
-
Your browser will prompt you to choose:
- Open - View the document immediately in your default viewer
- Save - Download the document to view later
You cannot view documents by clicking on the document group name. You must select a specific document within the group.
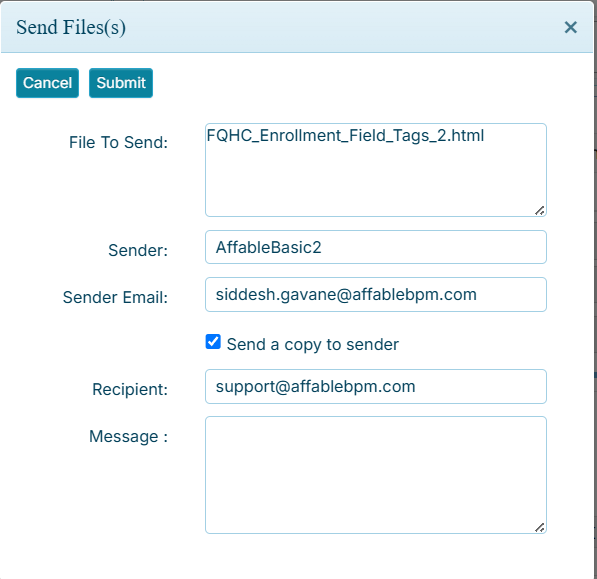
Emailing Documents
To send a document via email:
-
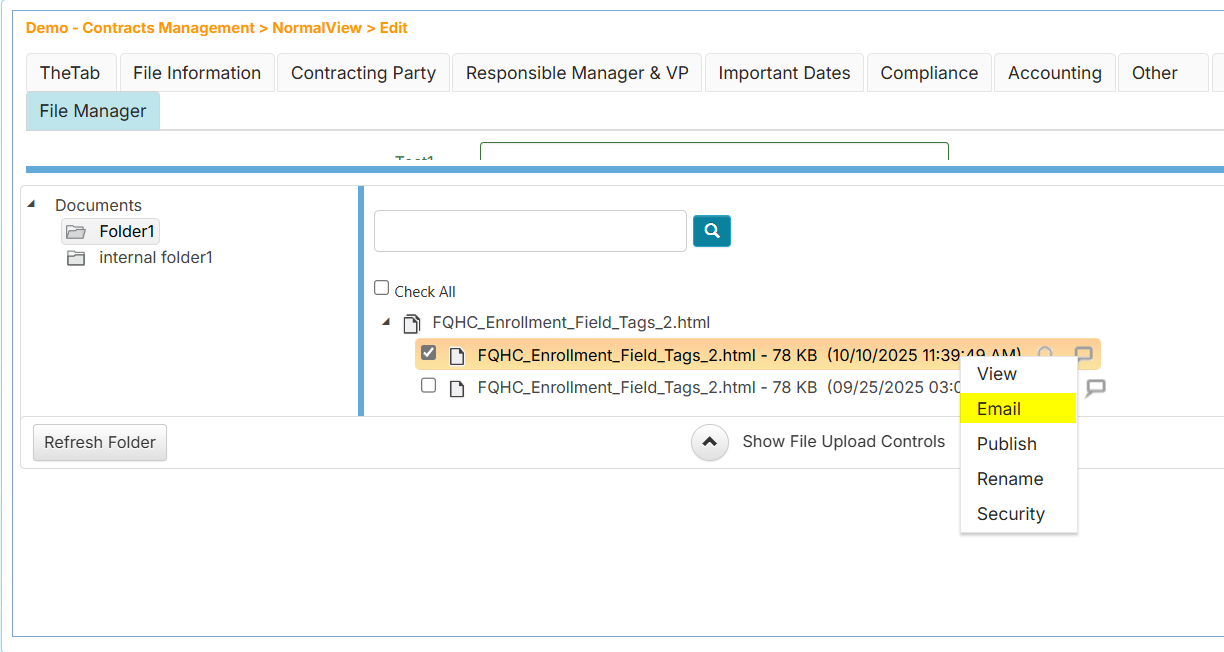
Right-click on the document (not the group name if it's a grouped document)
-
Select Email from the context menu
-
In the email window, enter the following information:
- Recipient's email address
- Your message (optional)
-
If you want to receive a copy, check Send a copy to sender
-
Click Submit to send the email
You can email several documents at once by selecting multiple documents in the File Manager (using the checkboxes), then right-clicking and selecting Email. All selected documents will be attached to a single email.
You cannot email documents by clicking on the document group name. You must select specific documents within the group.
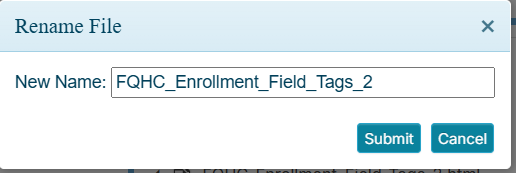
Renaming Documents
To change a document's name:
-
Right-click on the document
-
Select Rename from the context menu
-
In the Rename window, enter the new name for the document
-
Click Submit
Renaming Duplicate Documents
If you're renaming a document that has duplicates (grouped documents with the same name), you'll see an additional confirmation dialog:

- Click No to rename only the selected document
- Click Yes to rename all documents in the group
You can right-click directly on the document group name and select Rename to rename all documents in that group at once.
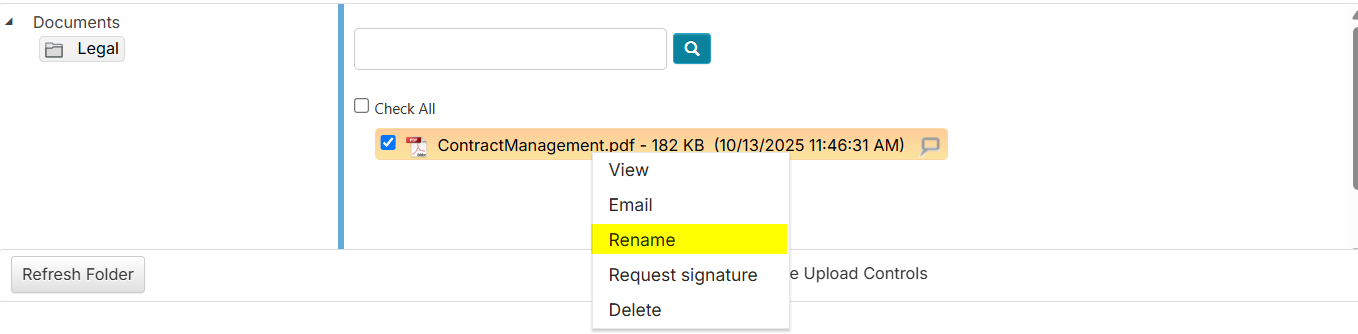
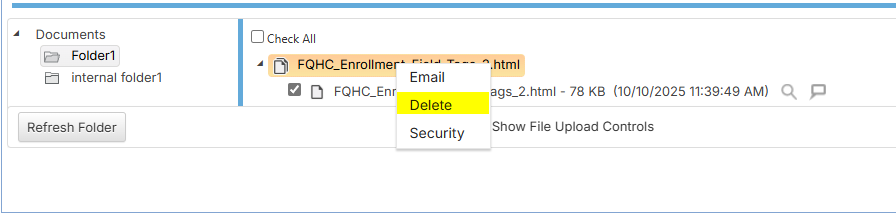
Deleting Documents
To remove a document permanently:
-
Right-click on the document
-
Select Delete from the context menu
-
In the confirmation window, click Delete File to confirm deletion

- You can right-click on the document group name and select Delete to remove all documents in that group
- You can select multiple documents using checkboxes and delete them all at once
- Deletion is permanent and cannot be undone
Setting Document Security
If you have been granted security rights, you can control who has access to specific documents.
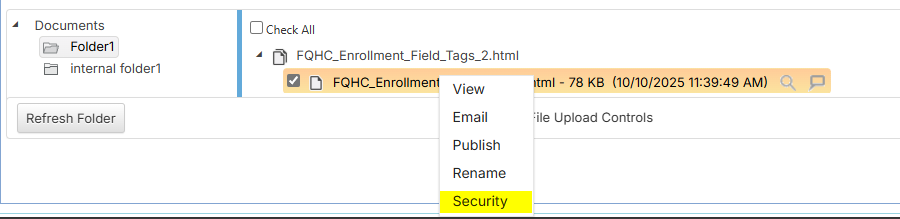
Accessing Security Settings
-
Right-click on a document
-
Select Security from the context menu
Configuring Access Permissions
The security settings window will display all users and groups:
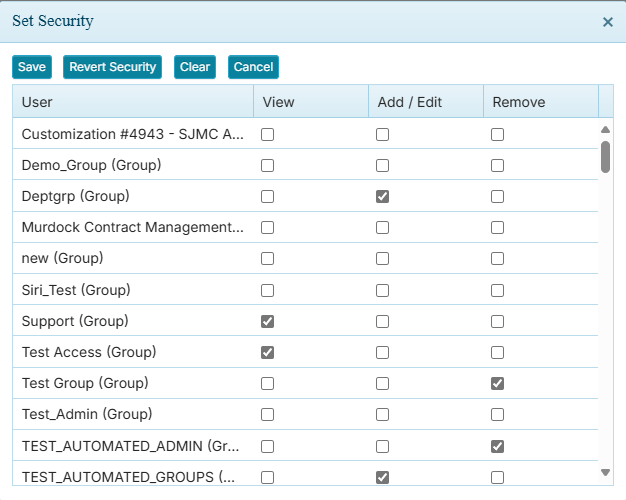
To grant or revoke access:
- Check the box next to a user or group to grant access
- Uncheck the box to revoke access
- Your changes are applied immediately
Document security settings control who can see and access the document. Users without access will not be able to view, download, or email the document.
Working with Multiple Documents
You can select multiple documents simultaneously to perform bulk operations, which saves time when managing many files.
How to Select Multiple Documents
Check the box next to each document you want to select:

Available Bulk Operations
Once you've selected multiple documents, you can:
- Move them to a different folder
- Email them as attachments in a single email
- Delete them all at once
- Set security permissions for all selected documents
To perform a bulk operation, right-click on any of the selected documents and choose the desired action from the context menu.
Use bulk operations to efficiently manage related documents, such as moving all contracts from a specific client to an archive folder or deleting obsolete versions of documents.
Frequently Asked Questions
Can I create my own folders?
Yes, you can create your own folders in the File Manager.
What file types can I upload?
The File Manager supports common document formats including PDF, Word documents (DOC, DOCX), Excel spreadsheets (XLS, XLSX), images (JPG, PNG), and text files. Contact your Administrator if you need to upload other file types.
Is there a file size limit?
Maximum file size limits are typically 20MB. If you encounter upload errors, your file may exceed the allowed size limit.
What happens to deleted documents?
Deleted documents are permanently removed and cannot be recovered. Always verify you're deleting the correct documents before confirming the deletion.
Can I see who uploaded a document?
Upload information including date, time, and user details can be found in the Audit Logs window if you have been granted the permission.
Need Help?
If you encounter issues or have questions not covered in this guide, contact your system Administrator for assistance.