Dashboard Reports
The Dashboard Reports menu allows you to grant user access to dashboard reports. These reports can be user-defined (see Save as Dashboard) or custom coded by our technical team upon customer request. Users with manager or administrator roles are authorized to grant access.
How to Grant Dashboard Report Access
Step 1: Security
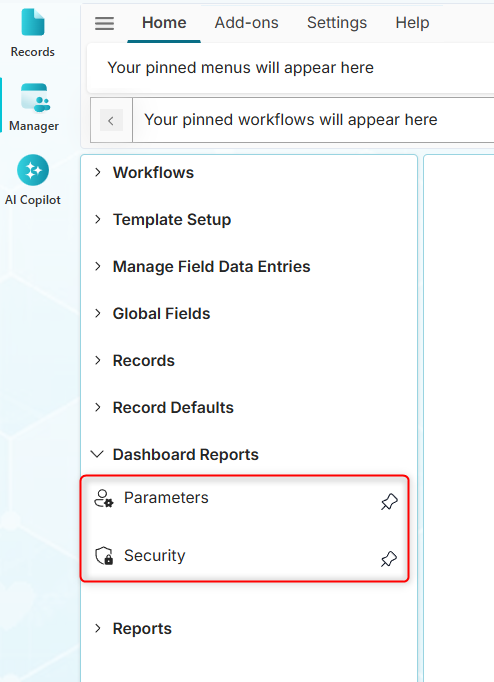
The Security page allows you to grant view access to dashboard reports.
-
Click the Dashboard Reports, then its Security submenu.
-
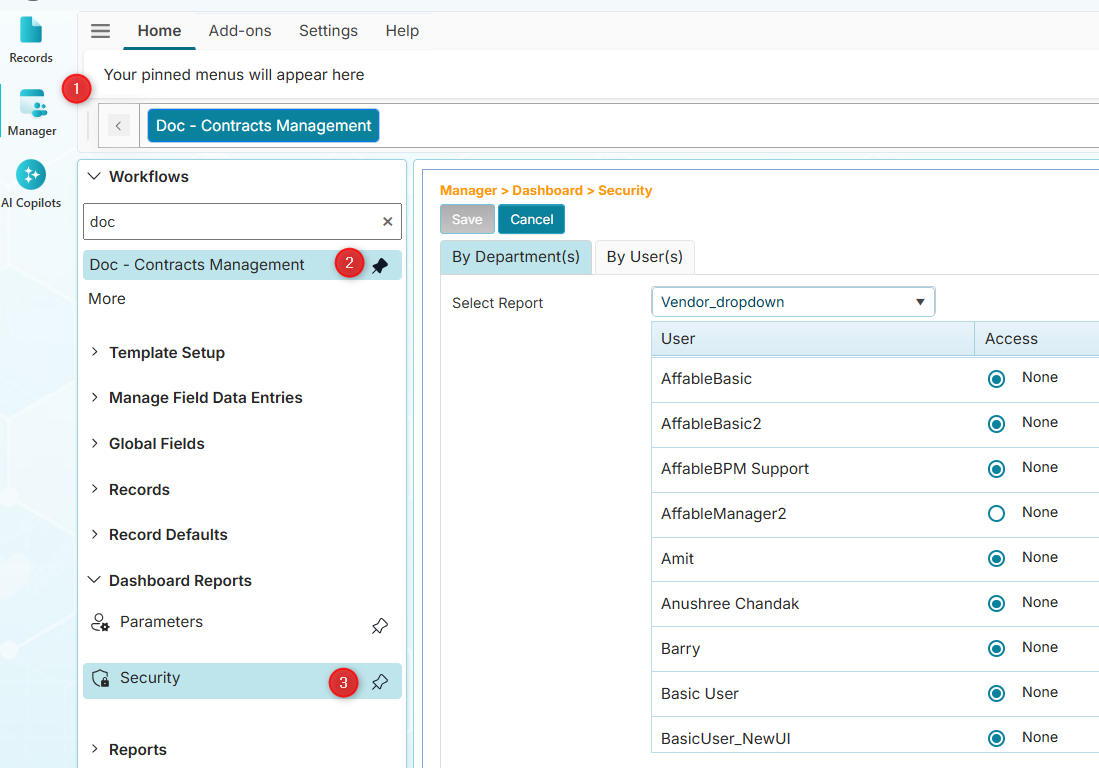
From the Workflows menu, find and click your assigned workflow.
-
Grant dashboard access using either of the following methods:
-
By Departments - *This label will be replaced with By Reports.
-
Click the By Departments tab.
-
From the Select Report dropdown, choose the dashboard.
-
In the User column, find the user you wish to grant access to and select the View option.
-
Click the Save button to commit your changes.
 📸 This screenshot will be updated to reflect our new UI.
-
-
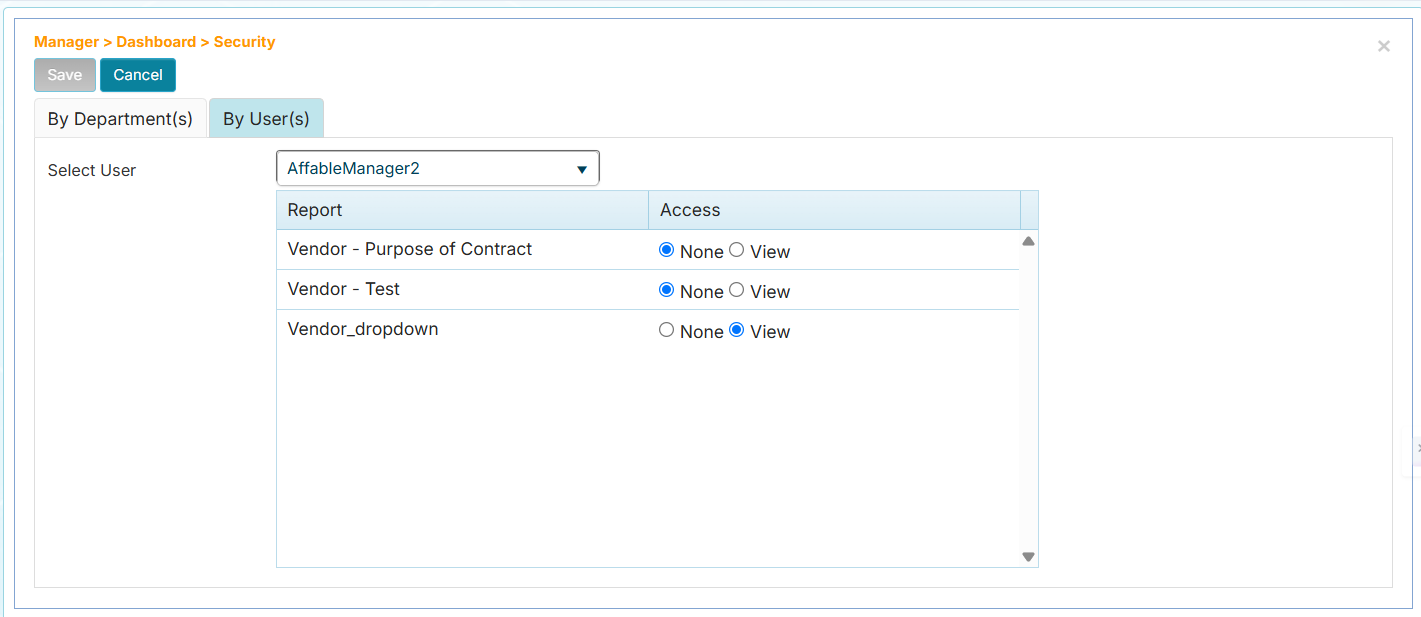
By Users
- Click the By Users tab.
- From the Select User dropdown, choose the user.
- In the Report column, find the report you wish to grant access to and select the View option.
- Click the Save button to commit your changes.
-
Step 2: Parameters
Once dashboard report access is granted, you can allow users to filter the row values they can view in the report.
- The Parameters setting applies to dashboard reports that have been configured to use a dropdown field parameter for filtering row values. Learn more about specifying parameters on the Save as Dashboard page.
-
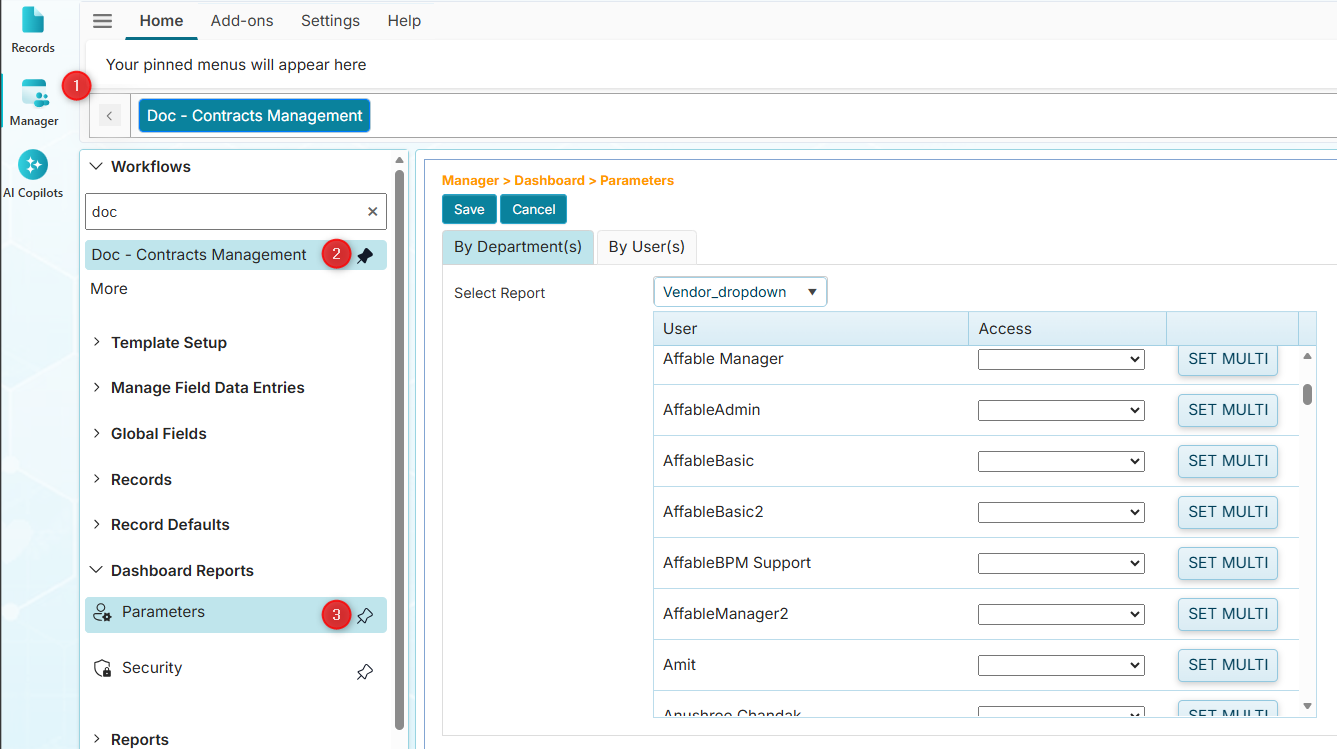
Click Dashboard Reports, then select the Parameters submenu.
-
From the Workflows menu, find and click your assigned workflow.
-
Grant the use of row filters using either of the following methods:
-
By Departments - *This label will be replaced with By Reports.
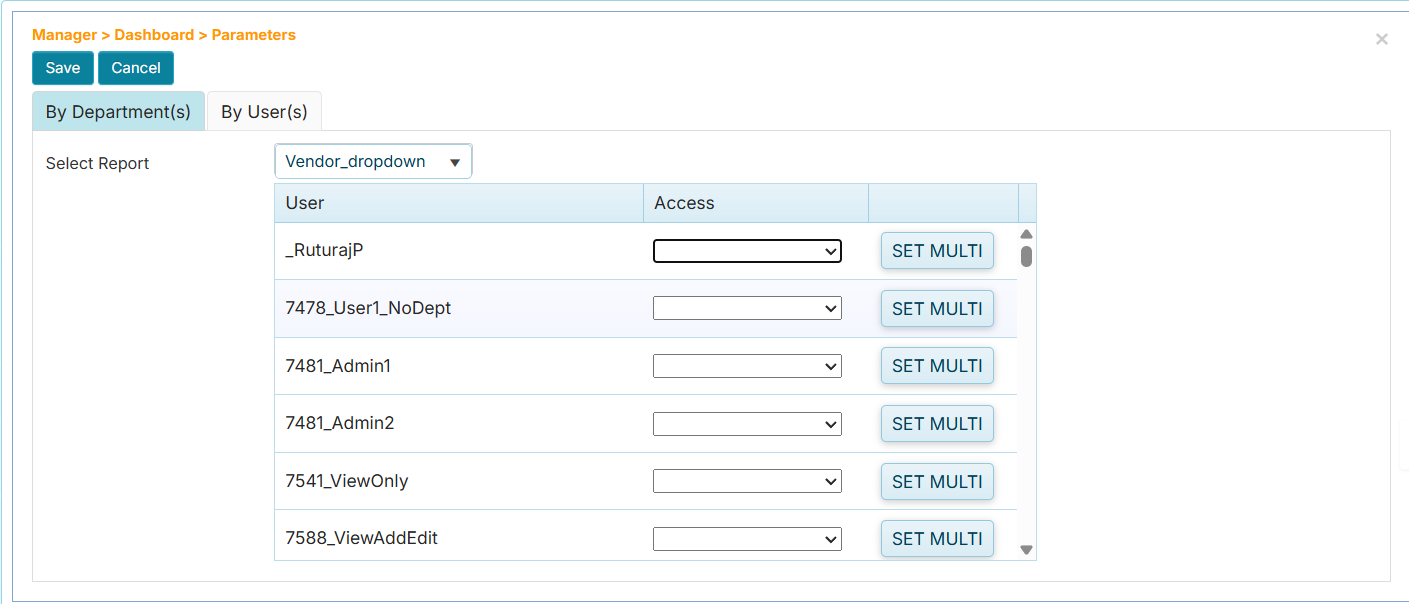
📸 This screenshot will be updated to reflect our new UI.
- Click the By Departments tab.
- From the Select Report dropdown, choose the dashboard.
- In the User column, select the user you want to allow to use the row filters.
- In the Access column, click the dropdown to choose which row filter option will be allowed. See Access Column Filter Options for more information.
- Click the Save button to commit your changes.
-
By Users - Allow row filters by selecting a user.
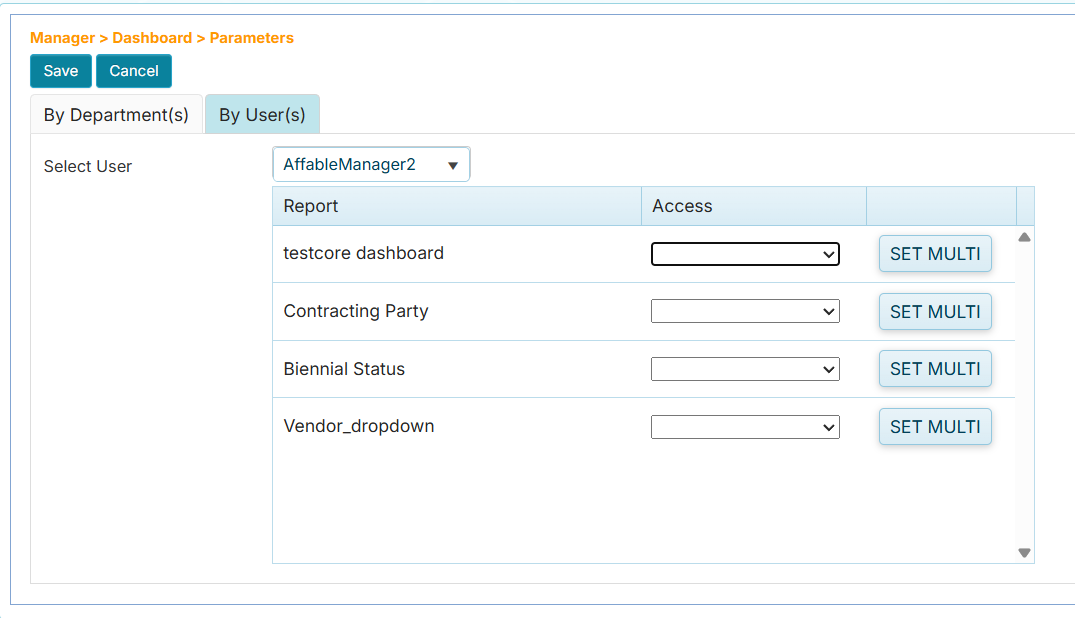
- Click the By Users tab.
- From the Select User dropdown, choose the user.
- In the Report column, find the report to allow row filters for.
- In the Access column, click the dropdown to choose which row filter will allowed for the user. See Access Column Filter Options for more information.
- Click the Save button to commit your changes.
-
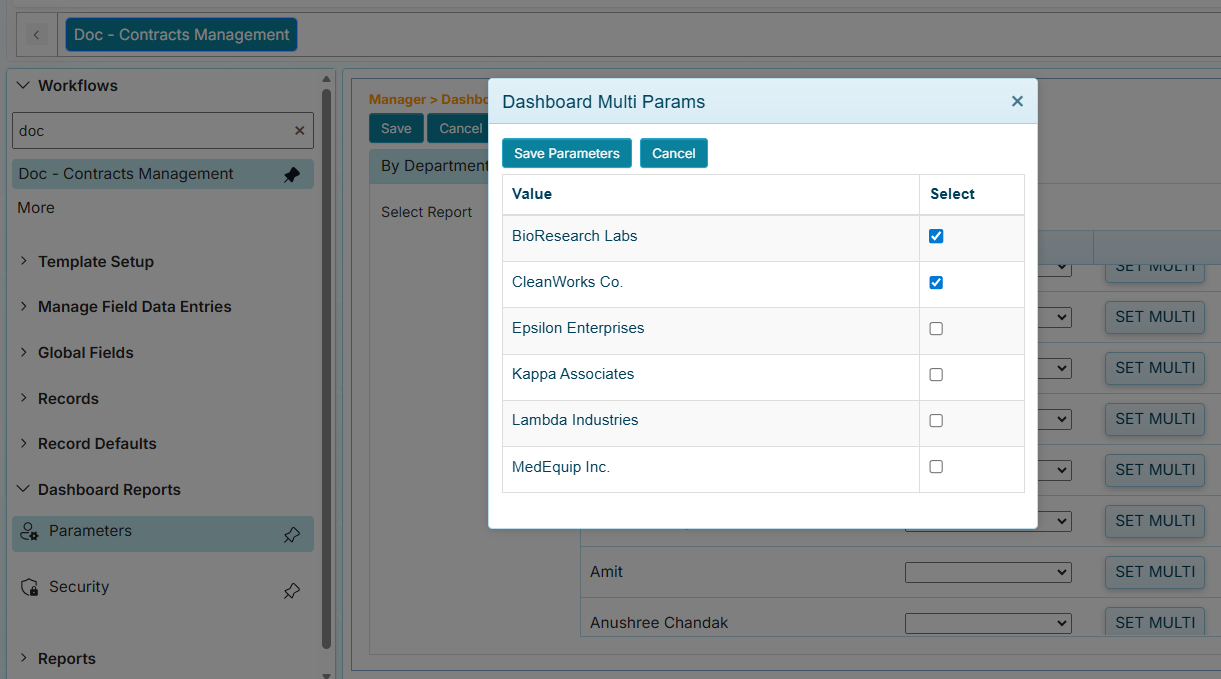
Access Column Filter Options
The Access column offers the following options to allows users to filter dashboard results:
-
None - Do not show the dropdown row filter.
-
All - Show the dropdown filter and list all values the user can filter.
-
Multi - Show the dropdown filter and list selected values configured from the SET MULTI option. If this option is selected, the SET MULTI button can be used to futher limit what values can be filtered.
-
Any value - Show the dropdown filter and list only one configured value.
The last saved parameter configuration either from either By Departments or By Users will be applied when the user accesses the dasboard report.